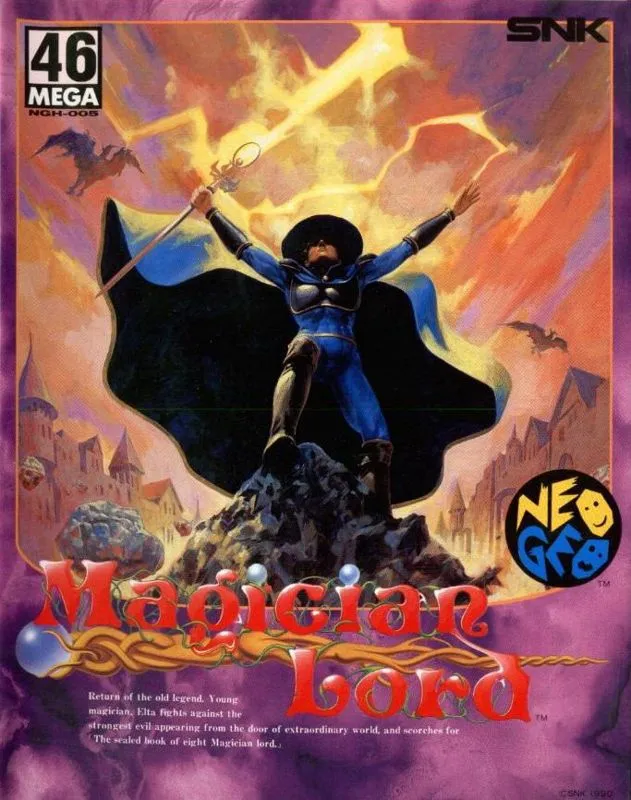
In the realm of classic arcade gaming, few titles command the same level of awe and nostalgia as “Magician Lord” on the SNK Neo Geo. Released in 1990, this side-scrolling platformer stands as a testament to the ingenuity of its time. With its captivating storyline, magical atmosphere, and challenging gameplay, “Magician Lord” has etched its name in the annals of gaming history. Join us as we embark on a journey to unravel the secrets and magic behind this iconic gem.
tip
I own Magician Lord US-Version since 1991, It was my first game on the SNK Neo Geo AES.
Alpha Denshi Corporation (ADK)
ADK (Alpha Denshi Corporation) is a Japanese video game development company that was known for creating games for the SNK Neo Geo system. ADK was founded in 1980, and during its active years, it contributed to the arcade and home console gaming industry.
One of ADK’s notable contributions was its involvement in the development of games for the Neo Geo platform, a system produced by SNK (formerly known as Shin Nihon Kikaku). The Neo Geo was known for its high-quality arcade-like games and had both arcade and home console versions.
ADK developed several titles for the Neo Geo, and some of their well-known games include the World Heroes series, Ninja Combat, Magician Lord, and Aggressors of Dark Kombat. These games were popular among fans of the Neo Geo system.
Plot and Atmosphere
At the heart of “Magician Lord” lies a rich narrative that unfolds in the mystical land of Magician Lord. Players assume the role of Elta, the eponymous magician tasked with thwarting the nefarious plans of the evil wizard Gal Agiese. The world is imbued with an otherworldly ambiance, enhanced by the hauntingly beautiful soundtrack that seamlessly blends with the atmospheric pixel art. Each level introduces players to a new realm, brimming with enchanted creatures and magical landscapes, creating a captivating atmosphere that keeps players hooked from start to finish.
Graphics and Soundtrack
Even by today’s standards, the visual appeal of “Magician Lord” is undeniable. The Neo Geo’s 16-bit graphics capabilities are showcased through detailed character sprites, vibrant backgrounds, and smooth animations. The diverse environments, ranging from eerie dungeons to lush forests, add depth to the gaming experience.
The soundtrack, composed by Hiroyuki Shimizu, complements the game’s mystical setting perfectly. The tunes resonate with an ethereal quality, enhancing the sense of wonder and urgency as players navigate through each level. The memorable melodies linger long after the game is turned off, a testament to the power of a well-crafted video game score.
Gameplay Mechanics
“Magician Lord” excels in delivering a challenging yet rewarding gameplay experience. The controls are responsive, allowing players to execute Elta’s moves with precision. Elta starts with a basic fireball attack, but as the game progresses, he can transform into various forms, each with unique abilities. From a dragon-spewing powerhouse to a gravity-defying ninja, these transformations add a layer of strategic depth to the gameplay, keeping it fresh and engaging.
However, it’s worth noting that the difficulty level of “Magician Lord” is not for the faint of heart. The game’s challenging nature demands precise timing, quick reflexes, and a strategic approach. While some may find the difficulty curve steep, seasoned gamers will appreciate the sense of accomplishment that comes with conquering each stage.

Level Design and Variety
One of the standout features of “Magician Lord” is its diverse level design. Each stage presents a unique aesthetic and a set of challenges, keeping players on their toes throughout the journey. From battling through hordes of enemies to navigating intricate platforming sections, the game offers a balanced mix of action and exploration. The boss encounters, in particular, are a highlight, requiring players to decipher attack patterns and adapt their strategies to emerge victorious.
Replayability and Legacy
Decades after its initial release, “Magician Lord” has retained its allure. The game’s replayability stems from its branching paths and multiple endings, encouraging players to explore different routes and experiment with various transformations. The title’s legacy is further solidified by its inclusion in various SNK Neo Geo collections, allowing new generations of gamers to experience the magic that captivated audiences in the early ’90s.
In the realm of classic arcade gaming, “Magician Lord” stands as a shining example of what made the SNK Neo Geo a powerhouse of its time. Its captivating narrative, enchanting atmosphere, challenging gameplay, and enduring legacy make it a must-play for retro gaming enthusiasts. As we look back on the mystical journey of Elta, we can’t help but appreciate the timeless magic woven into the pixels of this iconic title. “Magician Lord” is not just a game; it’s a testament to the golden era of arcade gaming and a reminder of the enduring power of well-crafted, immersive experiences.
Magician Lord cheat code
Magician Lord has no known cheat code beside using the Unibios.
Magician Lord tricks
- A memory card is highly recommended to save your position in the game,
- The arcade version let you start at the same position you died,
- The home version bring you back to the beginning of the stage level.
Jump trick
Magician Lord stage 1 easter eggs
The trick was confirmed on the MVS and AES systems.
Full game
In an emulator, in super easy mode because there is a lot less enemmies
Resources
FAQ (ARC) by MeSSiaH 18 Jan 1999
Date: Mon, 18 Jan 1999 16:35:41 -0500


THE UNOFFICIAL FAQ
For
MAGICIAN LORD
Copyright 1990,  Alpha Denshi CO. Ltd
FAQ Copyright 1999, THe MeSSiaH oF DaRKNeSS

Part 1-  Introduction
 1-1.  Other FAQs I wrote
 1-2.  About Magician Lord
Part 2-  How to Play
 2-1.  The Controls
Part 3-  The Hero
 3-1.  Elta
 3-2.  Dragon Warrior
 3-3.  Water Man
 3-4.  Poseidon
 3-5.  Shinobi
 3-6.  Samurai
 3-7.  Rajin
Part 4-  The Items
 4-1.  Changing Orb
 4-2.  Power Orb
 4-3.  Treasure
Part 5-  Enemies
 5-1.  Lesser Enemies
 5-2.  Guardians
 5-3.  Bosses
Part 6-  Stages
 6-1.  Stage one "Dale of Evil Gods"
 6-1-1.  Outer Stage
 6-1-2.  Inner Stage
 6-1-3.  Guardian "Skeleton Sword"
 6-1-4.  Boss "Face of Evil"
 6-2.  Stage two "To The Evil Mine"
 6-2-1.  Outer Stage
 6-2-2.  Inner Stage
 6-2-3.  Guardian "Skeleton of Moon"
 6-2-3.  Boss "Pulsating Eye"
 6-3  Stage three "Highway Leading to a Foreign Space"
 6-3-1.  Outer Stage
 6-3-2.  Inner Stage
 6-3-3.  Guardian "Alien"
 6-3-4.  Boss "Dragon Wyrm"
 6-4  Stage four "Castle of Devils"
 6-4-1.  Outer Stage
 6-4-2.  Inner Stage
 6-4-3.  Guardian "Warlock"
 6-4-4.  Boss "Hell Hound"
 6-5  Stage five "Anderground Passage of Terror"
 6-5-1.  Outer Stage
 6-5-2.  Inner Stage
 6-5-3.  Guardian "Boomerang Ax"
 6-5-4.  Boss  "Tower of Terror"
 6-6  Stage six "Corridor Leading to Hell"
 6-6-1.  Outer Stage
 6-6-2.  Inner Stage
 6-6-3  Guardian "Beautiful Assassin"
 6-6-4.  Boss  "Hell's Creation"
 6-7  Stage seven "Gal Agiese"
 6-7-1.  Outer Stage
 6-7-2.  Inner Stage
 6-7-3.  Guardian "Grand Knight"
 6-4-4.  Boss  "Incarnation of Az Atorse"
 6-8  Stage eight "God of Destruction Reincarnates"
 6-8-1.  Return of the Guardians
 6-8-2.  Final Boss "Spirit of Az Atorse"
Part 7- Ending
 7-1.  Ending
Part 8- Final Hints

PART 1-  Introduction
  1-1.  Other FAQs I wrote.
I have wrote two other FAQs so far "The Unofficial Solar Assault FAQ", and "Area
51 - Site 4 Unofficial FAQ" that is available at www.gamefaqs.com.  If you have
questions/suggestions about this FAQ or the other FAQs, please Email me at
"[email protected]"  (no quotes).

 1-2.  About Magician Lord
Magician Lord is side scrolling game released in 1990 by Alpha Denshi Co.  That
has a fantasy world like feel and that each stage has two areas.  What makes
this game so much fun is the fact that you can change your character into other
forms.  Even  through graphics and sounds are not impressive to today's game, it
was very impressive when this game was made nine years ago.

One might ask why did I make a FAQ for game that is so old.  Two reasons, one
there does not seem to be a FAQ on this game, and two with the release of
NeoRage not mention MAME's latest update this game is playable on Emulators and
many people have know idea how to get through this game.

The Story of Magician Lord is guide Elta though the eight stages to steal back
the eight books of wisdom from the God of Destruction Az Atorse.

PART 2- How To Play
 2-1. The Controls
The controls are an eight way joystick and two buttons (shoot and jump.)
Move the joystick left to move left or right to move right.  Move the joystick
down to crouch or descend a ladder, you can also use down to aim in that
direction when jumping.  Press the joystick up to aim up or ascend a ladder.
The shoot button fires Elta's current weapon the direction he fires is
controlled by the joystick.  Use the jump button to jump, the joystick controls
movement, and the time the jump button is held down determines height.  Hint
your height of a jump is also changed by what charter you are is the speed and
distance.  Also press up and jump to do a high jump.

PART 3- The Hero
 3-1.  Elta

  Is the Hero's normal form he attacks by blasting magic waves (2 at start but
increase with collecting power orbs) at  his enemies. His life bar  is the blue
squares (1 to 3 depending on the difficulty) the pink squares (1 to 2) are for
the other forms and when they go so does one of Elta's lives.

 3-2.   Dragonwarrior

 The Dragon Warrior is one Elta's other forms.  This form attacks with a fire
breath that is constant but short range.  Elta becomes the Dragon Warrior by
collecting 2 red changing orbs.

 3-3.  Waterman

 The Waterman is another of Elta's forms.  The Waterman attacks with bubbles
that travel a long distance following the floor but are weak.  Elta becomes the
Waterman by collecting 1 red and 1 blue changing orbs.

 3-4.  Posedion

 Poseidon is one of Elta's strong forms.  Poseidon attacks with a water pillar
attack that freezes enemies.  Pick up 2 blue changing orbs to become poseidon.

 3-5.  Shinobi
 Another of Elta's forms the Shinobi is one of the best.  Shinobi attacks with a
spinning fireball and has excellent speed and strength.  One needs to collect 1
red and 1 green changing orb.

 3-6.  Samurai

 The Samurai is Elta's best form.  With a powerful attack that goes through
multiple enemies and hits at least twice and great moveably the Samurai is the
best form to have.  Collect 1 blue and 1 green changing orb to become the
Samurai.

 3-7  Raijin

  The Raijin is last of Elta's forms.  The Raijin has an lighting attack that
covers all directions, but is very short range and weak.  Two green changing
orbs give you this form.

PART 4-.  The Items

 4-1.  Changing Orb

 The changing orb comes in 3 colors red, blue or green.  Collecting 2 changes
Elta's form.

 4-2.  Power Orb

  The power orb changes the strength of your attack plus the distance, size and
the amount you can shoot.  However you lose your power with each hit.

 4-3. Treasure

  Treasure gives you bonus points anywhere from 100 to 10000 points.

PART 5- The Enemies

 5-1.  Lesser Enemies


Skeleton- they come in a couple of colors but are very weak and easy to kill.
They hop around and run at Elta.
Trilobite-  appear on ledges and lob bullets at an arc.  Pretty weak.
Long Arm-  a medium strength enemy that attacks with a retraceable arm.
Electro Bird- they stand still and attack with a beam of lighting from their
beaks.  Unmobile but medium strength.
Mosquito-  fly from the sides of the screen and fire bullets.  Very annoying
enemies that like to appear around ladders.
Bug-  just like Trilobites but smaller.
Winged man-  teleport and attack with slow projectiles.  Medium strength.
Flying Head-  attack like Mosquitos but appear in larger numbers.  A real pain
when jumping.
Skull-  spin in from the background wraps its self in flames fires a bullet and
spins off screen.  Weak and easy enemy.
Ledge Horror-  appear as blobs first then change into skeleton like creatures.
That attack by firing bullets at Elta.
Gargoyle-  appear at of thin air and attack with slow moving projectiles.
Gargoyle Knight-  a strong enemy that rotates around the screen trying to slice
Elta with his sword and wing.
Fish-  appear in schools and attack with smaller fish.  Weak but have a very
annoying movement.
Treasure Hider- hides in treasure chest and hops at Elta.  Weak but very small.
Frog-  appear in whole messes.  They harmless in this but when they change look
out.  Try to kill as many as possible when they appear.
Frogman-  this what a frog turns into if left alone.  Strong and annoying
enemies that can easily destroy you.
Armored Dog- fast moving but weak.
Cat-  they jump around and attack with their claws.  Rather strong enemies that
are nightmares in groups.
Eye-  an enemy more annoying then Flying Heads.  Appear in large quantities and
attack with straight fireballs.  A real danger in stage 7.
Chariot Knight- rolls back and force trying to impale you.  A strong enemy but
has an easy pattern.
Sword Master-  first appear as bodyguards to stage six's guardian.  Then become
strong enemies similar to Cats but have a long ranger and take more hits to
kill.  The most dangerous of all lesser enemies.
Death Bringer- appears when you have spent to much time.  Unkillable and does
not leave until it kills you.

 5-2.  Guardians

These appear before the boss in each stage.  The names of the Guardians and
strategies on them are at the stages section.

 5-3.  Bosses

Each one guards a book of wisdom.  They are Az Atorse's incarnations.  Same
applies to these as Guardians more info in the stages section.

PART 6-  The Stages

 6-1.  "Dale of Evil Gods"
This is the first stage of the game, use this stage to get accustomed with the
controls.

  6-1-1.  Outer Stage
The Outer Stage is where you start the stage at it is a large area that has many
doors each door leads to an Inner Stage.  I will direct you to the correct door
for each stage, the other doors are not necessary to enter.

 Start by going right and kill a few Skeletons.  Continue right and hop up to
the next step watching out for the projectiles from a Trilobite that is above
and to your right.  Kill the Trilobite by jumping and shooting or by shooting it
from beneath.  Next take care of the Long Arm on the ledge you are on, just duck
when he attacks.  Kill the next Trilobite above you followed by the Trilobite on
your ledge.  Go right kill another Long Arm, then kill an Electro Bird use the
same tactic as a Long Arm.  Now continue right and be ready to turn and shoot
the two Skeletons behind you. Kill the Eltro Bird and descend the ladder.  Go
left and kill two Electro Birds to open a chest containing a Red Changing Orb.
Descend the ladder go right and kill the Skeletons.  Descend this ladder and
shoot the Skeletons and a few Mosquitos that appear.  Descend the last ladder
and kill the Long Arm.  Go right and drop to the lower ledge and kill the
Skeletons here then press up to enter the door.

  6-1-2.  Inner Stage
  Kill the Skeletons and ascend the ladder.  Go left kill these Skeletons then
ascend the ladder.  Watch the maces here they descend one then that ascends then
the other descends.  Continue right kill a Long Arm that is protecting a chest
that hold a little treasure and a Green Changing Orb.  Keep going right kill
some Mosquitos and open a chest with some treasure.  Duck and shoot the
Trilobite then grab the Power Orb in the chest.  Kill the Long Arm and continue
right to the descending ladder watch the maces before you descend.  After
descending that ladder you will meet some Skeletons, shoot them.  Descend the
final ladder beware of Mosquitos while descending this ladder.  Go right and
kill the Skeletons then continue right to the guardian.

  6-1-3.  Guardian "Skeleton Sword"
   This guy is easy to kill.  He can only be harmed in the air or when he
strikes.  Stand at the left edge face right and shoot when he jumps.  When gets
next to you jump straight up to make him jump back then shoot him.  Using that
tactic you should not even break a sweat or even take a hit.

"WHAT IMPRUDENCE, YOU HUMAN BEING!  FACE YOUR TRIAL BY GOD!"

  6-1-4.  Boss "Face of Evil"
Now this thing is a little tougher then the guardian but still easy.  The face
will shatter causing the ground to shake and create stalactites that fall in the
order they appear.  After this the wall open revealing a face that shoots either
a fast single fireball or a slow five shot.  Duck either fireball attack and
shoot the face.  Remember to watch the ceiling for stalactites that appear on
occasion.  Just continue shooting the face while ducking the fireballs and you
should kill this boss without a problem.

 6-2. "To The Evil Mine"
Stage two now get ready for false doors.

  6-2-1.  Outer Stage
Start by going right dodging the maces, they fall in a simple pattern just watch
them.  When moving through the maces keep a look out for Mosquitos that you
should kill.  Drop down to the lower ledge and kill a Trilobite followed by
another Trilobite to your right.  Leap to the ledge that the Trilobite was on
and kill a Long Arm.  Take the ladder going up, then ascend the next ladder.
Kill the Skeletons and Mosquitos here then go left.  Shoot the Trilobite and
ascend the ladder.  Now kill the two Long Arms above you before ascend the next
ladder.  After climbing the ladder jump to the platform and kill couple
Mosquitos.  Ascend the ladder you come to then shoot the Skeletons above  you.
Climb the ladder and duck to shoot the Bug.  Ascend the ladder jump to the left
platform and kill another Bug.  Use the ladder and kill the bug up top, then
drop to the right platform with a chest containing a Green Changing Orb.  Now
drop to your right continue right, and drop down the gap, then walk left land on
the platform with the door, enter.

  6-2-2.  Inner Stage
Drop off of the platform and steer your self to the bottom.  There are a couple
secret passages in the right wall.  The first passage contains a Blue Changing
Orb and some treasure.  The second passage contains some treasure and a few
Mosquitos.  The last passage has a Power Orb and Treasure.  At the bottom go
right open the chests for treasure watch the Wingedmen here.  Duck their first
blast then jump the next blast.  Walk on to the lift and ride it up, go left
kill the Mosquitos then face the guardian.

  6-2-3.  Guardian "Skeleton of Moon"
This guy is a little tougher to beat then the previous guardian but still not to
tough.  He attack by dashing across the screen or by leaping across.  Stand in
the center and shoot at him jump if dashes duck if he leaps.  You must watch him
closely he does not give warning when he attacks so be ready.

"I'M DESTINED JUST TO DIE!"

  6-2-4.  Boss "Pulsating Eye"
A little bit harder then the first boss but easily beat.  Elta will be on the
left edge while the boss hovers to the right.  The boss has a barrier that spins
around it protecting it from harm.  Shoot the boss in the gap of the barrier
watching for the spikes that the boss shoots, jump or duck depending on the
height.  After a while the barrier will fly off the boss and rotate around you.
If does not protect you from the boss's spikes, you still need to dodge them
don't jump to high.  The barrier makes three passes before returning, you must
jump out when it returns.  With those tips you should kill this boss without any
real problem.

 6-3.  Stage Three "Highway Leading To A Foregin Space"
Many flying enemies are here, beware they love to come from behind objects.

  6-3-1.  Outer Stage
Start by going right dropping down to steps and walking on to the moving
platform.  While riding the platform shoot the Flying Heads that try to knock
you off.  Once across the gap move right and jump a few steps.  Now before
warned that Flying Heads appear here usually from above or behind an object.
Next jump across to the right platform and drop down to the lower ledge.  Go
right and jump to the next platform you come to.  Now jump to another higher
platform and you will see a door to your right at the very end of the area.  Go
to this door and enter.

  6-3-2.  Inner Stage
This is the shortest Inner Stage there is.  Just run across the crumbling bridge
left killing some Flying Heads then ducking to shoot the Trilobite on the
stationery ledge.  Walk left to meet the guardian

  6-3-3.  Guardian "Alien"
Finally a guardian that is some what of a challenge.  He attacks by jumping in
the air then diving at an angle.  Stay about one to two body widths away and
shoot at him.  When he jumps run underneath him.  Remember to keep the distance
about that too close or too far will result in injury.

"THAT POWER IS POWERLESS IN OUR PRESENCE"

  6-3-4.  Boss "Dragon Wyrm"
This is a medium difficulty boss.  The boss is to the right across a gap.  The
boss attacks with either a laser or spread attack.  Duck or jump the laser
depending on the height, and leap to the high left step and shoot out the spread
attack.  Also spikes come out of the higher steps and try to impale you just
stand to the side and duck.  Start by standing between the two steps ducking to
avoid the spikes.  Now jump to the left step and fire at the boss.  If the
bosses nose start to flash get ready to dodge a laser if not shoot out the
spread attack.  Repeat until dead.

         6-4.  Stage Four "Castle Of Devils"
This stage is a little bit easier then the previous.  By the way the door you
need to take is the one right above you.

  6-4-1.  Outer Stage
Walk right and drop to the lower ledge.  Kill the skull and continue to the
right.  Now some Ledge Horrors will appear on the upper platforms, shoot them.
Keep going right until you reach a ledge that you can jump to.  Jump on this now
go left jumping from platform to platform until you reach the door or go right
and test you skill against some Gargoyles and Gargoyle Knight.

  6-4-2.  Inner Stage
Walk right and shoot the Fish and ascend the ladder next to the wall. Only open
the bottom treasure chests here the others contain Treasure Hiders.  Descend the
next ladder and go right jumping across the crumbling ledges.  Open the chest
that contains a Red Changing Orb.  Next drop down the gap where the crumbling
ledges used to be, then descend the ladder you come to.  Walk left and kill more
Fish and descend the ladder.  Go right to the guardian.

  6-4-3.  Guardian "Warlock"
A little bit easier to beat then the Alien.  He floats above you and summons
monsters or fires a projectile.  Stay underneath him firing up at him.  Shoot
the monsters he summons when they land.  Just move out of the way when he fires
his projectile.  The real trick to beating this guardian is to kill the monsters
as soon as they land, this keeps them from over crowding the screen.

"YOU, PERSISTENT GUY.  BUT YOUR LIFE ENDS RIGHT NOW."

  6-4-4.  Boss "Hell Hound"
In one word is boss is ugly.  He attacks by leaping from end of the screen to
the other and lobbing bullets.  Stay in the center and fire at the boss moving
left or right to dodge the bullets he lobs.  Warning you may not come out of
this battle unharmed.

 6-5.  Stage Five  "Anderground Passage of Terror"
From now on the stages will be very hard.

  6-5-1.  Outer Stage
Start by going right killing the Frogs or Frogmen if you let them change.  Hint
don't let them change.  Drop to the lower ledge and kill the Eletro Bird.  Go
right and drop to the next ledge and keep going right.  Next drop down a couple
of steps that have some Frogs on them, kill the Frogs.  After this drop to the
next ledge and kill another Electro Bird and drop to the next ledge.  Walk right
on to column like platform and kill the Electro Bird here.  Leap the gap and run
right through the long passage stopping to kill the Skeletons that appear.
Descend the ladder to find two chest each containing a Blue Power Orb.  Descend
the next ladder and go left to find some treasure, only in the bottom ones, or
go right and descend the next ladder.  Descend another ladder and kill two
Electro Birds and go left.  Shoot the Electro Bird and ascend the going left and
ascending another ladder.  Continue left killing more Frogs then descend the
next ladder.  Enter the door.

  6-5-2.  Inner Stage
This is one big maze with many possible routes, I will tell you one.  Go right
and take the first ladder going up.  Go left and kill the Electro Bird
continuing left until the third descending ladder.  Take the ladder kill the
Electro Bird and Frogs followed by another Electro Bird. Keep going right
killing Electro Birds and take the seventh ladder.  Walk right shoot the Frogs
then an Electro Bird.  Ascend the ladder and go right and ascend the next
ladder.  Keep going right killing more Frogs and an Electro Bird.  Descend the
fifth ladder go right open the chests for some treasure a Green Changing Orb and
a Power Orb.  Go right descend the ladder keep going right and descend the next
ladder.  Walk right to the guardian.

  6-5-3.  Guardian "Boomerang Ax"
Harder then the Warlock but not as frustrating as the Alien.  He can only be
hurt when he is airborne or during his attack.  Stay little bit from the left
edge of the screen shooting when he leaps.  When stops and throws the ax fire at
him right before it leaves and again when he catches it.  Remember to either
stand completely out of the ax's path or in the center of the path to dodge it
properly.

"FEEL FORTUNATE TO HAVE SURVIED UNTIL NOW."

  6-5-4.  Boss "Tower of Terror"
This the second hardest boss to beat.  It attacks by shooting blobs that bounce
around the room, they all bounce but the center ones.  It flashes before the
attack telling you which eye is going to attack next.  Here is what to do stand
in the middle of the screen shooting the blobs as they appear then jumping up to
hit the center eye when it's open.  If you destroy the blobs as they appear you
will survive the fight.

 6-6.  Stage Six "Corridor Leading To Hell"
The second last actual stage.

  6-6-1.  Outer Stage
Start by going right and shoot the Armored Dog and continue right killing
another Armored Dog.  Now kill the two Cats that appear and walk right.  Kill
another Armored Dog then go right to destroy the Chariot Knight.  Keep going
right and kill more Cats then ascend the ladder you come to.  Kill even more
cats and descend the next to the right.  See the door, you know what to do
enter.

  6-6-2.  Inner Stage
Step one kill the five Trilobites on the steps, then ascend the ladder.  Run
left and jump across the small crumbling ledges to the guardian.  If you fail on
your attempt open the chest at the bottom for treasure and Power Orbs.  Drop
right and take the steps and destroy the first barricade.  Fall down hold right
to land in the chamber.

  6-6-3.  Guardian "Beautiful Assassin"
This girl is a tough one to break (I know bad pun).  First thing is to kill off
the two Sword Masters here.  After they are done the guardian is nothing.  Now
jump her projectiles and blast her when the shield is down.  The hardest part of
this battle are the Sword Masters with the guardian

"YOUR ARE VERY DANGEROUS.  BE DEAD DOWN HERE."

  6-6-4.  Boss "Hell's Creation"
This thing is looks harder then it realy is.  Go to the left side shooting the
bottom piece then ducking to shoot the spores it produces.  After that piece is
gone walk to the right and stop when you just next to the middle part.  Kill the
middle piece, then move to the left of the eye and shoot up.  If you follow the
procedure correctly you should not take a hit in this battle.

 6-7.  Stage Seven "Gal Agiese"
Welcome to the hardest stage in the game not to mention the last real stage.

  6-7-1.  Outer Stage
Go left and leap the gap then ascend the ladder.  Keep going left and drop to
the ledge.  Now use the moving platforms to cross the long gap, beware of the
Eyes that try to knock you to your death.  Next head down the ladders killing
Skeletons then enter the door at the very bottom.

  6-7-2.  Inner Stage
Destroy the two Sword Masters that appear then go right taking the descending
ladder.  Kill more Sword Masters and continue right to the fire pit.  Use the
moving platforms to get to upper right ledge.  Now you should come to a ladder
going down.  Take this ladder and let one of the spears hit you so you can fall
into the guardians room that is to the left.

  6-7-3.  Guardian "Grand Knight"
Easily the hardest fucking guardian to beat.  You can only damage him when
thrusts the sword at you.  Beat him by shooting once jumping over him, then
repeating the procedure.  You will probably lose a life or two in this battle

"COME ON, NICE GUY!  BUT YOUR LIFE IS MINE VERY SOON"

  6-7-4.  Boss "Incarnation of Az Atorse"
I do not know why this is not the last boss.  He is the hardest mother fucker to
beat.  He is very cool looking for a boss looks like an evil winged angel.  He
attacks with a projectile that flies a short distance then spreads apart and
contracts back.  Stand on the left platform constantly shooting to the right
this way you damage him and destroy the projectiles.  Getting though this battle
with out losing a life is nothing short of a miracle.

"YES, I MADE A MISTAKE, BUT THE FIGHT IS YET TO FINISH.  MY SPIRT NEVER DIES"

 6-8.  Stage Eight "God Of Destruction Reincarnates"
Not really a hard stage just a bunch of battles.

  6-8-1.  Return of the Guardians
You must kill all the guardians again here.  They appear in the same order, use
the same tactics as before to kill them off.

"AZ ATORSE IS VERY STRONG TAKE THE FORM HERO, FOR THE FINAL BATTLE."

  6-8-2.  Final Boss "Spirit of Az Atorse"
First pick an alternate form to use (only during your first attempt).  The Ninja
and Samurai is the best bet.  Part one is destroy the big sack on the bottom
that attacks with flying sperm or lasers.  Shoot the sperm and dodge the lasers.
Once that part is gone the remaining piece will start to fly around then eight
orbs will appear below it.  These eight orbs are the weak points.  Stand in left
corner jumping and shooting the orbs when they appear.  Remember to jump when an
orb flies at you.  After are eight are destroyed watch the ending.

PART 7- Ending
Do not read unless you want the ending spoiled for you.

 7-1.  Ending
The books you collected will fly off to the castle in the background.  Then you
will see Elta with the Elder and the will say to Elta.

"YOU DID WELL ELTA.  PEACE HAS RETURNED TO THE LAND.  THE GREAT EARTH IS GREEN
AGAIN AND WATER FLOWS ONCE MORE IN THE RIVERS.  AND NOW, A NEW LEGEND IS BORN IN
THE PEOPLES MINDS.  THE LEGEND OF THE MAGICIAN LORD."

Next the credits will appear while the eight books take there place on the seal.

PART 8- Final Hints
1.  The last door in the Outer stage is the correct door.
2.  Grabbing a Changing Orb refills your life.  So do not pick up a Changing Orb
at max life.
3.  Power Orbs are helpful against guardians and Bosses, but depend on them
because they are easily lost.
4.  Learn the enemies attacks and patterns.
5.  Unless you some sort of a cheat, don't except to beat this game without
continuing let a lone a life.


***THIS FAQ MAY NOT BE SOLD, ONLY DISTRIBUTED IN THE ORIGINAL FORM***
Walkthrough (NEO) by VicViper_Mk2 V 1.0 5/06/12
Magician Lord
Developed by: ADK
Published by: SNK
Year: 1990
Walkthrough

Created by: Vc Viper
Contact me @: [email protected]

Copyright Info
This "Magician Lord" FAQ is copyrighted by the author, Kevin He. If you wish
to use this FAQ on your site, distribute it or display it for any reason,
the author's permission is required. This FAQ should not be used for profit
or gain of any kind. Violation will be reported if one fails to do so. This
FAQ is only authorized to be displayed on the GameFAQ site (www.Gamefaqs.com)
Please e-mail me for permission if you need to reprint it.

CONTENTS

1.	Update
2.	Introduction
3.	Controls
4.      Game Mechanic
5.	Power-ups/Items
6.	Enemies/Hazards
7.	Walkthrough
8.      Credits

1. Update

V 1.0 5/06/12
First Version.

2. Introduction
Magician Lord is a side-scrolling platform game made in 1990 by ADK and
published by SNK for the Neo Geo . In the game you control a young wizard
named Elta, the last descendant of the Magician Lord, on a quest to retrieve
the 8 Magic Books stolen by the forces of evil lead by Az Atorse.

3. Controls
The joystick moves Elta left or right. A button is attack, and B button is
jump. Tap B slightly to do a hop, or press it down to jump the full height.
You can attack upward by holding the direction Up while pressing A, or
downward by jumping then hold Down and press A. Certain forms of Elta allows
you to attack diagonally upward by holding the desired direction and pressing
A, and downward by jumping and holding the desired direction.

4. Game Mechanic

HUD
The top shows your current score, the high score, your remaining lives, and
the current orb combination you have. The bottom shows your current HP
(Blue is Elta, pink is transformed) the current power level, and the timer
(may or may not appear depending on system setting)

Difficulty
The game has a difficulty of 8 different levels that can be adjusted by the
Operator. The increased difficulty will affect the enemy's health and
movement speed, guardians will be quicker, more resistant, and some even
have new moves. Also determines your starting HP.

HP
This is your health. The amount you have depends on the difficulty level,
3 bars for 1-3, 2 bars for 4-6, and 1 bar for 7-8. You also have 2 bars for
your transformed state (1 bar in difficulty 7-8) When you lose these 2 bars
you revert back to Elta, and lose a life when the remaining HP is lost.

Invincibility
In a strict sense, there isn't any. The moment you are hit Elta begins to
flash and rear in pain off the ground, this is the only time when no other
attacks can hurt him. As soon as he lands on the ground however, the
invincibility ends even when he is still flashing for a moment. So if you
land right into another enemy/bullet/hazard, you'll take damage again, and
again, until you are dead.

Time
You start with 2:30 which is the normal time, there are also 2 other
settings which can deduct either 30 seconds or 60 seconds on top of the
normal time, this applies to everything from stage to guardian battle and
boss battle. Each stage has its own time limit, for example the 1st stage
has 2:30, while the 4th stage has 4:00. Both outer and inner stage share
the same time. If you die during the stage the timer is reset to the stage
limit. Guardian battle has a normal time of 1:30, and if you die 1 minute
is added, every subsequent death will reset the timer with 1 minute added.
Boss battle starts at 3:00, if you die 2 minutes will be added, subsequent
death will reset the timer with 2 minutes added.

If the timer hits zero, a large tentacle monster will descent on you, and
quickly drains your HP until you die. When you start on a new life, the timer
is reset to the stage limit and the monster disappears. However, should you
time out during a guardian battle the monster will also appear and will not
leave even on a new life, heck it won't leave even on a continue. So you
either have to use the few seconds of invincibility at the start of each
life to damage and destroy the guardian, or start the game anew.

The normal time setting gives you enough freedom to roam around and take side
trips to pick up treasures and power-ups. But if the time deduction setting
is on, there will be only enough time to get to the guardian, so don't stand
around.

5. Power-ups/Items
Throughout Elta's quest, he will come across treasure chests, these chests
can hold either treasures that gives you different amount of points, or
power-up that transforms Elta and power-up his attacks. Some chest however,
carries enemies within.

The Change Orb
This is the fundamental power-up in Magician Lord. With the right combination
Elta can transforms into various forms with different powers that may aid his
quest. There are 3 colored orbs: Red, Blue, and Green. Grabbing an orb
refills your entire HP to max, so keep that in mind when you are low on HP.

You always begin the game with a red orb in the right box and the left box
empty(also applies if you lose a life) If you get another orb, the new one
pushes the old one to the left box while it remains in the right. Now
whichever colored orb is in the left box will never be in any treasure
chests containing a change orb. For example if you have red orb in the
left box, any other treasure chest that contains an orb will either be
green or blue, but never red.

With this in mind, you can know ahead of time what your next form could be.
Let's say you are using a Dragonwarrior, your next 2 possible transformations
is Shinobi or Waterman, if you are Shinobi and lost the transformation, your
next possible transformations are Samurai, Raijin, or Shinobi again.

Elta
Your default form, Elta attacks with a blue crescent wave that flies straight
forward. He can have up to 2 on the screen. He can attack in the 4 basic
directions but can't attack diagonally. His walking speed is average but on
the slow side, and his jump height is kind of short. The wave gets bigger and
stronger with each power level, at level 3 it is quite powerful and can
defeat even some of the stronger monsters in one hit.

Usage: If you are good, you should never see this form again after picking up
the first change orb, otherwise you'll spend a lot of time with him, and
that's usually after taking 2 hits and losing your transformation and 2
power level. Find a change orb and power up quickly, or death is just moments
away when you are using Elta.

DragonWarrior
2 Red
DragonWarrior is arguably the best form in the game. Shooting out a jet of
flame that can toast even the strongest enemies in seconds. His advantage
comes from the high rate of fire and damage per second. It is also the only
form that can attack diagonally and 1 of 2 forms that has automatic trigger
instead of manually hitting attack. The flames can also go through walls and
surfaces, but not though shields and barriers. It is not without weakness.
The initial length of the flame is quite short, even fully powered it is only
average. The flame cannot hit ground based enemies even on crouch, so you
need to do a small hob and aim diagonally to hit them, which is quite hard
when not powered up. The Dragonwarrior is also the 2nd slowest form when it
comes to walking, and has a short jump.  Use it well and this form can
utterly destroy everything in sight.

Usage: Fully powered, it can kill anything with ease, and mob the floors with
guardians and bosses alike. Jump while moving can increase his slow walking
speed somewhat, but don't jump haphazardly and land onto an enemy or hazard.

Waterman
1 Red 1 Blue
This form is tricky to use but it does have some special traits. Waterman
throws out a water droplet in an arc, when it lands on the ground it creates
a water pillar that shoots upward, to the same height as the Waterman
standing. He can throw only 1 droplet initially, but every power-up lets him
throw an extra one, for a maximum of 3 at a time. The droplet has the unique
property of bypassing shields and protective barriers that certain
guardians/bosses possess. Giving you an opportunity to strike them at anytime
without waiting for an opening. The droplets are quite weak, the only way to
increase its damage output is prolonged contact, which is best done with the
water pillar. Since the pillar only appears on the ground, this makes it
unsuitable for air battle, the droplet falls to the ground way too quickly.
Although faster than Dragonwarrior, it has the same jump height as Elta.

Usage: Although the droplet can go through barriers, the water pillar which
does the most damage cannot be formed in midair, and most bosses have weak
point above ground level, severely limiting its usage. It is quite useful on
the stage 2 boss but that's about it. Other time its best used to restore
full HP if you're about to die. But change out of this form as soon as you
can.

Poseidon
2 Blue
Easily the hardest form to use. Poseidon is basically a powered up version of
Waterman. Instead of throwing water droplet, he throws a big water bubble
that creates a wave of water pillars. The wave is initially short, but gets
longer with each power-up. Much more powerful than the Waterman's pillar
since the wave can sweep over multiple enemies while constantly damaging
them. Like the droplet the water bubble can bypass shields and barriers.
He has the same weakness as Waterman, plus being the slowest form in the
game. Also unlike the droplet, if you throw the bubble directly up or down on
an enemy, it will just disappear and do very little damage, make sure the
bubble is traveling in an arc to hit enemies normally.

Usage: Same as the Waterman, only it's even more useless with its slow attack
and movement.

Shinobi
1 Red 1 Green
A good all-around form. Shinobi throws a crescent shaped fireball forward at
medium speed. Power-up stacks an additional fireball on top of the previous
one, for a total of 3 fireballs that counts as one projectile. He is also the
fastest walker and highest jumper. While he doesn't have an automatic trigger
like Dragonwarrior, his fireball when fully powered is fairly strong and can
decimate most enemies quickly. However only 2 fireballs are allowed on screen
at a time, so he might be left defenseless if the current fireballs haven't
left the screen and enemies are approaching. Getting close to an enemy will
allow him to attack repeatedly without the limit, increasing his damage
output but also puts him at greater risk of injury. His fireball, though big
in size, has a bit of a hit detection problem when it comes to hitting some
of the smaller targets on bosses, especially on the 2nd part of the final
battle.

Usage: Very strong form if you like to take risks and get up close and
personal with bosses, close range rapid fire with power level 3 can kill
most bosses even faster than the Dragonwarrior. Precision is the key with
Shinobi, missing a fireball will leave you defenseless against the oncoming
enemy hoard.

Samurai
1 Blue 1 Green
One of Elta's best forms with good range and damage.  The Samurai creates a
crescent shaped energy blade with a slash of his sword, the blade starts from
behind the samurai and circles around the samurai before disappearing.
Power-up will increase the range of the blade. The blade, like the water
droplet can bypass shields and barriers, but is significantly stronger. One
sweep can destroy a group of weak enemies. For stronger enemies, it is best
to distance yourself so that the blade can come into contact with the enemy
for a longer period when it is at its farthest point.  While not a very fast
walker, it does have a high jump.

Usage: Great for crowd control, especially with his long reaching, barrier
ignoring blade. Good with bosses that have barriers so you can attack as if
they weren't there, and bosses with bigger weak point to keep the blade on
them for more damage. He has the same hit detection issue like Shinobi when
it comes to the 2nd part of the final battle, and some guardians will give
him trouble with their small size.

Raijin
2 Green
Quite possibly the most underestimated form. Raijin creates an electrical
field in the shape of an 8 point star. The field gets bigger with each
power-up.  Raijin is the other form along with Dragonwarrior with an
automatic trigger. Because the field covers all direction, no aiming is
needed. Attack while jumping turns Raijin into a spinning ball of doom.
Having multiple points touching the enemy doesn't increase the damage,
just one point is enough.  His only weakness is the field's damage per
second is lower than the Dragonwarrior, but the tradeoff to attack all
directions is well worth it. Average walking speed, but jumping is equal
to Shinobi.

Usage: Use it carefully and nothing can get close, much less touch you.
Aside from the stage 2 boss whom needs a bit of risky jumping to defeat at
power level 3, it works well with most bosses. Destructible projectiles
can't harm him with the field on.

Power orb
These increase your power level by 1, to a maximum of 3. You start every life
with power level 1. If you are hit, you will lose 1 level of power.
Increased power level will make attacks stronger and longer reaching. Stay
safe and hold onto these for as long as possible.

6. Enemies/Hazards
There is a good amount of enemies in Magician Lord. The later stage enemies
are usually palette swapped version of the original, but may have increased
resistance to damage.

Skelton:  A basic enemy that teleports into a predetermined point on the
ground, pauses for a second and runs after you. It runs very quickly, so
fast that even with Shinobi you cannot outrun it. If you jump over it, it
will not turn out to chase you, rather spins in place a few times then
teleports out. Later versions run even faster. Very weak in defense, any
attacks can kill them easily.

Trilobite: Usually placed in either raised platform or flat on the ground.
They shoot 2 bullets out of their eyes periodically at a fixed angle. They
cannot turn around nor shoot backward. Not very difficult, but annoying.

Arm demon
A humanoid creature with an extendable claw that slowly launches and retracts.
When launched, the claw itself acts as a shield and absorbs projectiles. You
can safely duck under the claw, the extending arm itself is harmless to the
touch. More resistant than Skelton but still easy.

Mosquito
A large bug that flies in a wave pattern from the side of the screen,
periodically firing a precise shot aimed at your current location. They
usually come in pairs, either one on each side of the screen or both from
the same side. Very annoying, often appears when you are taking too long to
proceed throughout the stage. Prioritize them first against other enemies.

Electro Bird
Appears as a hole in the ground at first, when you get close it rises from
the whole and shoots 2 blast of electricity from its forehead, then quickly
cover itself with both wings becoming impervious to damage. After a brief
moment it opens up and resumes the attack pattern.  Simply duck to avoid the
attack and they are easily taken out.

Wandering Skelton
A bit taller than the regular kind, these skeletons are usually found sitting
around. When you approach them, they will stand up and march slowly towards
you. Like the regular Skelton, these guys don't put up a fight and are just
cannon fodder.

Face shooter
A small button like creature stuck on the floor. Periodically they change
into a face that spits out a bullet in a fixed trajectory. Similar to
Trilobite, only they can shoot one bullet at a time and there is a greater
pause between each shot. They can change the direction they're facing, making
them a bit more dangerous than Trilobite, plus they are even smaller and
harder to hit.

Winged demon
A green demon with wings. It teleports in from behind you
(or whichever direction you're not facing) and throws a blue ball that
travels straight with medium speed. It does a little dance afterwards and
teleports out, and teleports back in a split second later and resume the
pattern. If you have a fast walker, you can try to outrun it, but they
usually come in groups, and might throw enough balls to form a wall that's
impossible to dodge. The position they teleport are in relation to your
position, if you jump they'll appear in midair, they can even teleport into
walls. Quite damage resistant, but easy if you take them on one at a time
and jump or duck their ball.

Floating Trilobite
While physically weak, they make it up with sheer numbers. Typically comes in
a swarm, they slowly float towards you, while occasionally shoot out a bullet.
Like Mosquito, they will also appear when you are taking too long. They can
pass through walls and surfaces, and approaches from multiple angles can
easily overwhelm you. Attack fast and kill them before too many appears on
screen.

Alien Cannon
A cannon that glows red at the tip before firing a single bullet. Has a long
reload time and can only shoot to the left. The cannon itself is safe to touch.
Can be ignored to save time.

Alien Spider
It moves back and forth, occasionally launches 3 mini version of itself that
crawls quickly towards you. Not really a threat by itself, but the mini
spiders is quite small and difficult to hit with some attacks. Destroy them
while they're in midair for best result.

Eyeball Skelton
A skeleton that teleports in at a predetermined point on the ground and stays
there, while shooting eyeballs from the mouth. The eyeballs will follow Elta
until they time out and disappear by themselves. Although they have a
lifespan, they move too quickly to outrun and wait it out, plus the Skelton
will keep firing more eyeballs nonstop until it is destroyed. You can shoot
the eyeballs to destroy them. Usually appears on ledges.

Skull
These guys appear from the background in front of you, wrap itself in flame
and quickly fire a bullet before flying away diagonally upward in an arc.
They too are an enemy that appears if you take too long. Be careful when
climbing ladders, since sometimes they can hit you when they are leaving. If
you're on a ladder when they appear, they will move with you until you finish
climbing before firing their shot. They too can appear and move through walls
and surfaces.

Gargoyle
This gargoyle fires a 3 bullet spread aimed downward and it swoops down in an
arc and repeats. Destroy it quickly before it can fire the shots.

Leap demon
A skinny red demon that appears from the background leaps diagonally into the
air, before shooting a bullet aimed diagonally downward as it falls to the
ground and disappears into the background. May catch you by surprise, but
easy to defeat.

Fish
A group of fish that moves either left or right. After moving a short
distance, it shoots out a smaller fish from its mouth as projectile. The
smaller fish cannot be destroyed. Typically comes in large groups covering
a good amount of the screen, destroy them quickly to prevent them flooding
the screen with their projectiles. They can move through walls and surfaces.

Gargoyle Knight
A mini boss. The knight appears in the background and comes to the foreground,
dashing across the ground before returning to the background and comes back
for another pass. Other than being damage resistant, its attack pattern is
simple to avoid.

Minion
A red colored demon that walks around quickly and occasionally jump high into
the air. They will do a quick bow sometime and stop momentarily.  Summoned by
the Stage 4 guardian. They are not tough to defeat, but if you don't kill
them as they appear, the guardian will just summon more until there are too
many on screen.

Frog
A regular frog. Although most are harmless, some will grow into frogmen which
are not. Armed with trident, they repeatedly jump at you. Highly damage
resistant, they are very dangerous by themselves or in groups. You can find
out which frog will grow by attacking it in its frog form, if it takes a lot
of hits and still doesn't die then it will change. With enough attack it is
possible to destroy the frog before it changes.

Armor Dog
A dog dressed in armor, they run very quickly and can leap into the air for
aerial attack. Not very resistant.

Cat girl
Usually found sitting around, when you approach they quickly move close to
you and unleash their claw swipe. If you are far away they will leap to close
in the distance. Quite resistant, they too are dangerous in groups.

Chariot
Just like the Gargoyle Knight (minus appearing from the background). It moves
back and forth, trying to impale you with the lance. The lance itself acts as
a shield and absorbs projectiles.

Floating Eye
Just like the Floating Trilobite, these eyeballs will slowly float towards
you and shoot out a fireball. They can move through walls and surfaces. Their
fireballs are a bit faster than the standard bullet.

Sword Master
A girl armed with a sword. She can leap great distance to close in and
slashes with her sword, but for some reason are always slightly out of range
of you. She can use her sword to put up a guard that will reduce the damage
she takes, making her the most damage resistant normal enemy in the game.

Hazards
Monsters aren't your only enemies; there are many traps and environmental
hazards that can harm you. All of them have either a set pattern or ways to
avoid it.

Bottomless pit
Like its name suggest, a pit without a bottom (or just a very big drop), fall
in and its instant death.

Fire pit
A  pit with fire burning. While it doesn't kill you instantly, the injured
animation and the lack of invincibility might as well equal an instant death.
Some of the fire pits are much larger, and impossible to jump out in time
should you fall in. Usually there is an alternate route that goes around the
pit, or floating platforms to help you across.

Ball and Chain
A  spiky ball attached to a chain that drops down from the ceiling before
retracting. These usually come in a row, and they either drop one at a time
or in pairs. Watch the timing when it retracts and move forward. Alternatively
you can also jump through the chain part which is harmless.

Ceiling Spike
Stuck on ceiling, these individual spikes drops straight down when you pass
under them. Because the speed they drop down is quite fast, walking ahead of
them is difficult. Instead get under it and quickly retreat, the spike should
fall down and miss you completely.

Aerial Spike
Appears only in one stage, a mass of flesh with spikes protruding from it.
Simply avoid it.

Wall Spear
A spear attached to the side of a wall that periodically thrusts out. The
spear usually comes in groups, and with either thrust out by itself or in
pair. They appear around ladder. Time your movement carefully to get past
each one. There is usually enough space in between spears as safe spots.

Spear Bed
The classic spike on ground. A bunch of spears in rows placed in the ground.
They don't move. Usually appears in areas where precise jump to narrow
platform is needed.

7. Walkthrough
The walkthrough covers all the paths, including the side areas. It is played
through the Dragonwarrior form. I will mention the chests with the change orb,
but the color of the orb depends on your current combination
(Refer to the game mechanic section to see how the orb is determined to appear)

Stage 1: Dale of evil gods
Time: 2:29
As you appear in this strange land, proceed right and take out 2 skeletons.
Entering a broken temple, 2 trilobites are perched on raised platform while
an arm demon walks on the ground below. Further ahead is another trilobite on
the ground and another arm demon, followed by 2 electro bird and 2 more
skeleton teleporting behind you. You'll arrive at a ladder to climb down with
2 electro bird guarding the first treasure chest which contains a red orb.
Grab the orb and change into the mighty Dragonwarrior. Down another ladder is
a group of 6 wandering skeleton waiting around, and another 6 on the next
ladder down. By this time Mosquitoes are probably showing up from both side
of the screen; take care not to get hit. Take the final ladder down and
defeat an arm demon, then get off the platform and face off with 6 wandering
skeleton waiting around a door; this door takes you to the inner stage. Don't
be stupid and jump off the bottomless pit to the right of the door.
Enter the door.

Inner stage
Immediately greeted by 3 wandering skeletons. There is a fire pit that's
impossible to jump across, so take the series of ladder to the left all
the way to the very top. Be careful, as 2 ball and chain are positioned
irectly above the ladder. An arm demon on the right with another chest
containing a change orb. This next part is a bit hard if you are the dragon.
A 2nd chest contains treasure, followed by a trilobite, a 3rd chest and an
arm demon. At power level 1, the dragon's flame is too short to hit the
trilobite (you have to do a small hop and aim diagonally downward to hit it)
and if you waste too much time the mosquitoes will just keep coming and give
you even more trouble. Don't destroy the 2nd chest, jump on top of it like a
platform and jump over the trilobite (make sure it's not firing first) and
you'll land right on the 3rd chest. Take out the arm demon and the 3rd chest,
which contains a power orb. Now your flame is a bit longer, you can use the
hop technique to take out the trilobite and get the treasure in the 2nd chest.
To the right is a ladder going down, which also has 2 ball and chain directly
above it. Climb down and take out the 6 wandering skeleton. Don't climb down
the 2nd ladder. Instead walk off and hold right. The reason for that is as you
are climbing down 2 mosquitoes flies in from the left and will surely hit you.
Take out the wandering skeleton group and advance forward. The music will
suddenly change, this means you have reached the stage guardian. Get ready.

Sword Skelton
Time: 1:30
Armed with a sword and shield. The guardian can jump away at will and advance
towards you and slash with its sword. There is a very easy tactic to beating
it. Simply stand at the far left and wait till the guardian advances right
next to you, as you see it about to swing the sword jump straight up and
attack, the sword slash will miss and the guardian jumps backward, right into
your attack and takes damage. Repeat.

Difficulty 7-8: Same pattern, only it advances towards you twice as fast.

Now you are teleported away, as Az Atorse mocks you with some witty comment
on your progress, you then face off with the boss of the stage.

Face
Time: 2:59
You arrive at the boss chamber, which consist of a bridge covering 3/4th of
the screen, a small gap and a face on the opposite wall. In case the bones
bubbling in the hot lava below you doesn't give you a clue, don't fall in or
its instant death. Right from the start the room shakes and rock spikes drops
from the roof, you can see where they will drop as they appear on the ceiling
for a moment before dropping. Navigate safely through them and the room stops
shaking. The face on the wall will shatter, reveling a giant pincer that opens
up and a purple alien face pops out. This is the weak point. The boss has 2
attacks; it either shoots out a single fireball that travels straight, or a 5
fireball spread. It can also attack 2 or 3 times before retracting into the
pincer, using the same attack or alternating between the 2. The fireball
themselves can be ducked, they start out small but grows larger as they
travel (but still duckable) The spread can easily be dodged by ducking farther
away, but the bare minimum distance to duck is just a bit left to the 2nd
bridge struts. At this point if you are the dragon and haven't lost your Level
2 power, your flame is just barely able to reach the face if you stand on the
space of the 2nd bridge struts. Hit it a few times and quickly move to the
safe spot on the left to dodge any incoming fireballs. From time to time the
room will start shaking again and you'll have to content with rock spike as
well as the fireballs. Move to the left side of the bridge so you can dodge
the fireball easily while avoiding the spikes. Repeat this pattern and soon
the boss is defeated.

Stage 2: To the evil mine
Time: 2:59
As you start to exit the mine tunnel to the right, a series of ball and chain
will drop from the ceiling as well as 2 advancing mosquitoes. Get pass them
and 2 trilobites and an arm demon awaits you. Climb up the ladder, you'll
be right under a group of wandering skeleton, a trilobite on the far left,
and a barely visible mosquito flying in from the right. You can eliminate the
skeletons by shooting up, just move to the right to avoid the bullets from
the trilobite and watch for the ones fired by the mosquito. Climb up the 2nd
ladder and a door appear right beside it. This door leads to an optional area,
it is not necessary to go in, but there are good rewards inside.

Optional room
You land on a platform with a ladder going down. You can see 2 more ladders
but you can't reach those yet. Walk off and hold left to fall down the next
floor, 4 face shooters are on the ground. Quickly use the small hop method to
destroy them before they fire their shots and climb down the next level. 2
more shooters are waiting by the ladder. Moving to the left, the ceiling in
this long hallway is lined with ceiling spikes that drops down when you get
under it. Take it slow and wait for them to drop one at a time.  A few
skeletons will teleport in, there is also an arm demon patrolling the area as
well as 3 face shooters guarding a ladder going up, with 3 more shooters on
the floor above. The next floor up has a wing demon teleporting in. Climbing
one more ladder takes you to the top floor, where the real action is. An arm
demon guards near the ladder you climbed up, further to the right is a series
of ball and chain, as well as 3 winged demon teleporting in, when you get to
the ladder on the right there is another arm demon and a few skeletons that
teleports in from behind. Climb down the ladder and you'll be on the platform
that you saw in the beginning when you entered the area. Walk off the platform
to the right, there will be 2 more winged demons before receiving your reward,
10 treasure chests stacked together. Among the various treasures, one of them
has a power orb, while another one has a change orb. If you were careful and
didn't take a hit, your power level should be at 3 now. The flames will be
even longer and stronger. Exit through the door on the right.
If you went in the optional room, the wandering skeletons will have
regenerated, as well as the mosquitoes. Move left to where the trilobite was
and climb the ladder, 2 arm demon are walking back and forth above you. From
there you can see another door, this leads to the inner stage. There are some
wandering skeleton on the right if you want to destroy them, but going there
will also send 3 mosquitoes flying in from the right. Whatever you do don't
climb the ladder, jump on platform instead. If you want, the platform directly
above the door has a ladder leading to a chest that contains a change orb. Go
through the door.

Inner stage
You appear on a small platform, there is no visible path but a giant drop. So
walk off the platform and hold right, you'll fall right past the 1st of the 5
aerial spikes, and then move left a bit so you're in the center, then 2nd
spike will pass by the right. Immediately hold right again, you'll fall into
an alcove with 3 chests, one with change orb and 2 with treasure. Walk off
again and hold right, you'll fall on a small platform. Repeat the last step
and you'll fall into a fake wall. Move right and take out 3 wandering skeleton
and claim the treasure from the chest beside the ladder. Climb down and there
is another chest with treasure to the left. Go back
(you'll most likely encounter mosquitoes on your way back) and fall down the
shaft again while holding right. The 3rd spike passes you on the left, as well
as the 4th just as you land in another fake wall. Climb the ladder and the
chest here has not only treasure but a power orb too, in case you taken a hit
earlier and lost some power. Fall down the shaft again and this time hold
left, the final spike will pass you on the right as you land on the ground.
Proceed right, you'll see 3 chests stacked, but a winged demon will teleport
in, in fact there are 3 of them near the chest. Take them out first
(remember you can make them appear in the air by jumping before they teleport
in, allowing you to stay safe from their ball attack) the chests contains
treasures. Once you got everything move right and get on the elevator, it
will propel you up at great speed. Make sure you walk on the elevator and not
jump to the far right, since when you reach the top the elevator propels you
up in the air, if you don't hold left and land on the ground the elevator will
drop back down and you will slowly fall back down and must try again, wasting
a lot of time. Once you are on solid ground, move to the left and the guardian
music plays.

Moon Demon
Time: 1:30
The guardian comes in from the left. It has 2 attacks; it creates a crescent
shaped energy field and runs across the screen, or does an arcing leap with
the field on.  It will use one of those attacks to make its entrance. The leap
covers the whole screen length, while it can be ducked, only if you stay
relatively close to it, so jumping over it when its falling is safer. Its
biggest advantage is its unpredictable. There is no way to tell which of the
2 attack it will use next. Although it will use the leap attack more often if
you are on the opposite end. The energy field may look like a barrier but it's
actually not, so attacks can still get through. With careful timing this
guardian is easy win. Onto the boss.

Difficulty 7-8: Same pattern, but charges across the ground at great speed.
The Arcing leap however is still the same speed as lower difficulties.

Giant Eye
Time: 2:59
Remember the setup for the first boss, this one is very similar. Only the
tree branch platform you stand on is only 1/3rd the length of the bridge and
the lava is replaced by a bottomless void. The eye enters from the right and
hover in midair, 11 small balls linked together rotates clockwise constantly.
They act as a barrier and block projectiles, so your flame won't get through.
There is a gap that you can get your attack to go through. You do however,
have to stand near the edge of the platform in order to hit
(assuming your power level is 3) Once the barrier rotates 3 times, it will
move away from the eye on the 4th revolution and rotate around the platform.
As soon as you see this is about to happen, stand to the very left and move
into the gap when part of the barrier moves under the platform so you don't
get hit. The barrier continues to rotate clockwise, during this time I don't
recommend attacking since the window of opportunity is very small and the
risk is great. When it rotates 3 times, it will leave the platform and return
to the eye, make sure you jump out through the gap to avoid getting hit.
During all this time, the eye will periodically send out spikes that shoot
out straight. They can shoot out from various different heights. The hard
part when facing this boss is when the barrier is rotating around you, the
longer the boss remains alive, the more chance it has to shoot spikes at you.
High ones you can just duck, but if they are low, you have to do a small hop,
a high jump will only get you hit by the barrier, this is made even harder
when sometime 2 spikes shoots low one after another, or one low and one
medium height, making it impossible to dodge. Do as much damage as you can
when the battle starts and just pray that you don't have to hop any low
spikes.

Alternatively if you are samurai or waterman your attack can ignore the
barrier all together, giving you plenty of time to attack the boss as it
makes its entrance.

Stage 3: Highway leading to a foreign space
Time: 2:29
You begin standing on a platform of a giant dead monster. Move to the right
and encounters the flying trilobite, these guys are twice as bad as
mosquitoes; they slowly float towards you while shooting. The last platform
you step on begins to move to the right across a giant chasm. Be aware that
the platform is always moving, so if you jump, the platform will still move
ahead and it will appear as you have moved back a few steps don't be careless
and jump off the platform this way. The trilobites will appear en masses in
this section. Finally jump off when the platform reaches the other side. There
are 3 optional rooms in this stage.

Optional room 1
You appear standing on a chest, which has a change orb. The bridge spanning
across the lava shrinks down when you stand on it, so keep jumping and moving
to the right. Take out and trilobites and exit the door on the right.

Jump to the right a few steps to reach the 2nd door.

Optional room 2
You stand on a platform, 3 other platform ahead has an alien cannon on each
of them. You can ignore the cannon or destroy them, just watch out when
they're about to fire. Pass the cannons is a clearing and the alien spider
makes its entrance as a mini boss. Stand at medium distance and attack, if
the spider shoots it mini version in the air take those down too. Do not let
them land on the ground, they can't be hit by crouch attack and must use the
hop technique, giving the spider more time to shoot even more spawns.  After
the spider is history, grab the treasure in the chest right in front of the
exit.

Back outside, the 3rd door is on a high ledge that requires a high jump, but
before you do that attack upwards, trilobites usually comes down through the
ceiling, and their presence can be hidden by the backdrop. Make sure it's safe
before making the jump.

Optional room 3
You start at a lower level, a chest in front of you with treasures and a
change orb inside, as well as 3 trilobites bearing down on you. Keep moving
upward, as you reach the 3rd level 2 eyeball skeleton will teleport in; take
them out as well as the two stationary trilobites above you. The exit is at
the top left.

The remainder of the stage is straightforward, keep moving right, take out
trilobite that gets in your way. You'll see the door to the inner stage at
the far right.

Inner stage
Very short, you stand on a platform. There is a lava pool to your left, a
stone bridge hovers above it. The bridge is made up of individual block.
When you step on a block, they fall down, so you have to advance quickly to
prevent falling into the pool below when you run out of bridge. Don't walk
across the bridge normally, instead advance by jumping, taking out any
trilobite that comes in your way. On the other side is another platform, but
a stationary trilobite is sitting on it. If you have a high jump character
like shinobi, you can try to stand on the last block then high jump over it,
or you can attempt a risky maneuver by standing on the last block and attack
while the block is falling down, destroying the trilobite and jump on the
platform just before you fall in the lava pool. Needless to say, for
Dragonwarrior this part is quite hard if you want to keep your form and power
level. When that's done move left and its guardian time.

Alien fish
Time: 1:30
Remember the 2nd stage guardian; this guardian shares the same unpredictable
nature. However it doesn't make its entrance by attacking, instead it just
walks in. It has 2 attacks. It jumps high into the air and dives down
diagonally at extreme speed, or it does the dive at a much lower height.
The unpredictable part is you don't know which attack it will use, but you
can exploit the one weakness it has. Until you attack it, it will not attack
and instead just walks around. You can land several attacks in, wait for it
to attack and get out of the way, and repeat. Easy. The boss however, is not.

Difficulty 7-8: Walking speed doubled, diving speed is unchanged.

Alien dragon
Time: 4:59 (the only boss that has 5 minute timer limit by default)
The setup is a bit more complicated this time. You're on a piece of land with
two small platforms attached, while on the ceiling there is a mirrored
version. The dragon is on the right side of the wall. As soon as the battle
starts, two teeth comes out from the platform on the ceiling and both land
closes in together. Stand on either of the platform to dodge it
(this is also the best time to attack the dragon) Once the land moves back to
their original position, the dragon uses 1 of 2 attacks, either shooting a
laser from its nose, or extend its neck and moves the head forward, pauses and
fires a spread of 5 rings from a hole near the back of the head. After the
dragon made its attack, the 2 teeth appear again on the ceiling, but this time
through the land instead of the platform. Do the exact opposite as the last
time and stand on the land to avoid the teeth. Afterwards the dragon gets to
attack again and the whole process just repeats itself. This is where the
Dragonwarrior shines, the rings it fires are very hard to destroy with
individual attacks such as the shinobi, but Dragonwarrior can just use the
flame to sweep all the rings the moment they are launched. The laser attack
can be easily jumped. The nose of the dragon acts as a shield to absorb
projectile. This is one of the tougher bosses in the game, but with some luck
you can beat it without too much effort.

Stage 4: Castle of devils
Time: 3:59
The stage with the best music in the game. Right from the start you see a
door not too far from you, but it's not the one leading to the inner stage,
that door is directly above you. There are 3 optional rooms in this stage and
this is one of them.

Optional room 1
A series of small platform moving up and down, on the bottom is a fire pit.
There is a lone chest on one of the solid platform that contains a power orb.
The exit is on the ledge to the left.

Skulls will function as mosquitoes in this stage; they'll appear from time to
time but only one at a time. Moving right, 2 eyeball skeleton will teleport
onto the raised platforms. Skeletons as well as a gargoyle will appear more
to the right. The 2nd door is here.

Optional room 2
You appear under a ladder, with wall spears ready to poke you. Note the chest
on the other side of the wall on a platform just above the rows of spear bed.
Carefully climb the ladder while avoiding the spears. At the top is the exit
as well as a chest with treasure in it. You can attempt to go down to the
right by stepping on the platforms that retract when stepped on. But the chest
there only contains a mimic, and if you're not careful it could knock you into
the spears below. Now you know. Exit.

Move a bit more to the right and meet up with another gargoyle and the 3rd
door.

Optional room 3
You can climb down the ladder, but there is nothing down there except an arm
demon, plus you could be hit while climbing down the ladder by a fleeing
skull. To the right is a collapsing bridge and fishes will suddenly appear.
Jump to the farthest block and hold right, you'll land in an alcove. Keep
moving right. Leap demons will appear in front or behind you. The ladder here
will take you to the lowest level where a bunch of wandering skeletons is
sitting around. The exit is also here, but goes back up and jump on the
bridge. Once again stand on the farthest block and hold right to fall in
another alcove. A stack of 6 chests is here, containing treasures, a power
orb and a change orb. Jump out the alcove and exit from below. Still moving
right, the last gargoyle appears and a constant stream of skeleton teleporting
in. When you reach a series of raised platforms, use them to jump up to the
highest level. At the right corner there are 3 chests with treasures, a power
orb and change orb. Now it's time to head back to the door leading to the
inner stage. As you jump off the high platform, just after the 3rd door is 2
high platforms beside each other. If you would like to fight a mini boss, or
just skip the entire skeleton fighting you can jump up here and jump to the
platform above the 3rd door. Only Shinobi, Samurai, Raijin, and Dragonwarrior
can jump high enough to reach it
(Dragonwarrior has to jump straight up instead of a directional jump) Waterman,
Poseidon, and Elta will have to use to much shorter platform located near the
2nd door to get up to the higher level.

As you move across the higher level, the screen will stop scrolling at one
point and you'll see the Gargoyle Knight in the background. A simple jump
over then attack strategy is enough to defeat it.

Using the series of platforms jump to the left until you are directly above
your starting point, the last door here leads to the inner stage.

Inner stage
There are 2 paths that lead to the guardian; one of them also splits into 2
more paths. One of them is quicker, while the other one yields a few rewards.

Quick path
Take the ladder from your starting position down, and down another ladder.
The path now splits into 2. You can go left, pass all the ceiling spikes, go
down 2 more ladders and keep moving right to reach the guardian, but this path
is dangerous and yields no rewards.
Or you can move right and come up to a collapsing bridge, only the blocks will
not fall when you step on it. They will only fall when you jump on the center
block and walk in either directionmore than. Do high jumps to the center,
then immediately hold left and as the blocks fall it will drop you in an
alcove with a stack of 10 chests containing treasures.

Reward path
Ignore the first ladder and climb up the second one. A total of 16 chests are
stacked here. But only the bottom 4 has treasure in it, the rest are all mimic.
Climb down the ladder behind the chests and you'll come up with a collapsing
bridge with blocks missing in between. Stand on the first block and hold left,
it will drop you into an alcove with 6 chests containing treasures, but is
also guarded with 4 ceiling spikes. To get back to the floor above you fall
out of the alcove and go left, use quick jumps across the bridge so it won't
collapse. Climb up the first ladder you see here and another one above it and
you'll be back at the starting point. From there just go back to the bridge.
With the first block gone, you'll have to do a short jump on the next closest
one (miss and you'll have to go back all over again) once you get on the block
simply hold right to walk across, you won't fall down the gap and will keep
walking to the next block, except the last block, which you must jump off and
into the alcove or you'll fall through the gap. Since the blocks don't
regenerate, if you mess up you won't be able to come back to try again. There
are 7 chests in total; one holds a change orb while the other holds treasures.
Jump out the alcove and hold left, because if you fall down straight 2 passing
fish will hit you, this way you can stay clear of them. Climb down 2 more
ladders and you'll be at the guardian.

I recommend you take the reward path first, after jumping out of the alcove,
you can proceed left and use the collapsing bridge to get into the 2nd alcove
for the treasure chests, then simply jump out and you'll be at the bottom level
where the guardian is. Once you're at the bottom level, keep moving right to
reach the guardian.

Wizard
Time: 1:30
A wizard that flies above you, it can move around at will. Occasionally shoots
out a blue fireball, but its main attack is throwing out 3 minions on the
ground. It will keep throwing more minions until there is too many on the
screen for you to handle. Take out the minions as soon as they land, then
focus on the guardian. Not very hard. The boss is a bit more challenging
though.

Difficulty 7-8: Instead of hovering above you in midair, the wizard can now
fly randomly all over the screen at incredible speed, greatly increasing the
chance of colliding with you. It also uses it's fireball attack more often.

Hellhound
Time: 2:59
This time, the setup is quite simple. No platforms, no pits, just flat ground.
Hellhound stands initially on the right side of the screen, it can choose to
jump to the left or right at any time. When it lands it will either jump away
to the other side again, or use its only attack, 3 bullets fired from its back.
It can shoot these bullets up to 3 times in a row if it chooses to. You can
easily dodge them by ducking right in front of its head; the bullets will
miss you completely. From here it's just simple routine until hellhound
explodes.

Stage 5: Underground passage of terror
Time: 3:59
This stage notorious for the frog enemy, which is what you see the moment you
start the stage. A group of frogs lands on the ground, while most are
harmless, some will grow into frogmen and they will chase you. Its best to
keep moving right, take out any electro bird along the way. Soon you'll enter
a narrow corridor; skeletons will teleport in from both sides. At the end is
a ladder, with 2 chests sitting on the level below, both carrying a change orb.
Down another ladder, there is 9 chests piled in a corner to the left, some
contains treasures (including a very valuable gem) but most contains frogs
that will grow into frogmen. Only the first 3 chests on the bottom counting
from right to left contains treasures, but unless you're Elta it's impossible
to break only those 3 chest without opening the others. The 1st door leading
to optional room is to the right of the ladder.

Optional room 1
Very simple, 3 arm demons walks on the bottom floor, while ceiling spikes are
planted facing down on sections of platform. As you walk under the platforms
the spikes falls down and the platforms shields you from the spike, perfectly
safe. To the right are 8 chests all with treasure and the exit.

Go down another 2 sets of ladder and 2 electro birds appear on both sides.
The 2nd door is on the right.

Optional room 2
Possibly the most dangerous optional room in the game. You stand on a platform
over a giant fire pit, there are additional platforms to help you across, but
they sink when you step on them, just like the 3rd stage bridge. Jump from
platform to platform until you reach the stairs and witness the horror. 7
frogs, all turns into frogmen, attacks at the same time. Because of its
strong damage resistance, even 1 frog will take a while to defeat, let alone
7. What's even worst is that there are 5 chests on the stairs, 2 of them has
a power orb each, one has a change orb and the other 2 has treasures. If you
get the power-ups, you'll most likely lose it from the onslaught of attacks.
You can try luring them one at a time by jumping back towards your starting
point, attacking on each sinking platform to do some damage. This is very
risky but also the only safe way you can claim all those chest content. After
all the frogs are defeated, you can grab the treasure from the 2 chest closest
to the fire (the closest chest has a high valued wand that will land in the
fire and becomes unobtainable unless you sacrifice your HP for it), the 3rd
chest contains the change orb, and the remaining 2 has the power orb. Exit
through the door.

The 2 electro birds have regenerated, past them is another electro bird
guarding a ladder going up, the 3rd door is to the left.

Optional room 3
Immediately you'll see the exit is directly above you, along with a chest. 2
sets of spear bed can be seen and a small collapsible bridge in between them.
Jump on the last block to the right, and when the block is falling down
immediately hold right and do a small hop to land you on solid ground, barely
missing the spear bed below. A ladder to the right with a chest containing a
change orb. Climb up carefully pass the wall spears, a ground of frogs falls
down, they all can change. Ignore them and quickly move to the left, the chest
here contains treasure. Exit the room before the frogmen catches up. Climb up
the 2 ladder on the left and another group of frogs that changes will appear,
climb down the only ladder here and enter the final door to the inner stage.

Inner stage
A simple yet seemly complicated maze. The basic layout comprises of 4 floors:
Top, middle, lower (starting point) lowest, and a secret room in the lowest
floor.  Your goal is the secret room, but how do you get to it, there is no
map, no directions. And with all these ladders going up and down which one do
you take? There is actually only 1 simple route that takes you there.  Most of
the other routes don't take you anywhere, the screen simply wraps back to the
beginning, giving the illusion that there are multiple ladders leading to
different areas. The correct route is as follows. From starting point move
right, ignore the 1st ladder and climb up the 2nd one. Continue moving right,
ignore the next ladder and you'll see 3 chests with a power orb, change orb,
and treasures. Climb down the next ladder after the chests. Move right and
take the 1st ladder you see down, this will take you in the secret room.
Proceed right to fight the guardian.

Axe warrior
Time: 1:30
A blue armored knight with an axe and shield. His main attack is to throw the
axe forward, that later comes back and catches it. He can also do a high jump
in the air, and does a short range strike with the axe when he lands.  The
only time he is vulnerable is during the jump, or the spilt second when he
throws out the axe and when he catches it. You have more time to attack if he
chooses to jump, just don't get cornered. Jump over the axe thrown, and jump
again when it comes back. You'll have to be patience when fighting this
guardian. The boss, for some forms will need even more patience.

Difficulty 7-8: No change.

Eye tower
Time: 2:59
For some forms, this battle is very hard, almost impossible, for others it's
a cake walk. The setup is the same as hellhound. Flat ground. The boss is a
thin tower that occupies the right side the screen, so you have a good amount
of space to move around with. The tower consists of an eye on top and bottom
of the tower, and a central eye (also the weak point) that opens and closes
in intervals. Its only attack is to shoot out a big ring projectile. The top
eye shoots diagonally downward while the bottom shoots upward. Both shoot 2
at a time. The center eye when it opens shoots a single ring straight forward.
Aside from the center eye ring, the other rings will bounce off the ground and
ceiling, drastically reducing your mobility. Since you have to destroy the
rings to keep you from getting hurt, you will have less time to focus on the
boss's weak point, and the boss will use this time to shoot even more rings,
eventually overpowering you.

However, if you have Raijin or Dragonwarrior with power level 3, then this
battle is a joke. Simply stand 2 character length away from the boss and aim
at the central eye (Dragonwarrior) or hold down the attack button (Raijin) the
flames will destroy any rings fired from all 3 eyes and damage the central eye,
while one point of the electrical field can damage the eye and the others
protects you from any rings the boss may fire.

Stage 6: Corridor leading to hell
Time: 4:59
With a stage name like that, you just know that the action will intensify.
This stage is fairly straightforward. Moving right, you are greeted by 2 armor
dog and cat girls, both of these enemies move very quickly so be on your guard.
The dog also can't be hit with Dragonwarrior unless you use the hop technique.
When the screen stops scrolling, another mini boss, the Chariot, shows up.
It's back and forth charging attack is so simple to avoid it can hardly be
considered a mini boss. Continuing right, 3 more cat girls shows up. By this
time you'll probably start seeing the floating eye now, these guys may float
towards you slowly, but the fireball they shoot moves faster than the regular
bullet, and they come in groups and endless waves. Keep moving.

Climb down the ladder and immediately 2 cat girls shows up. The path now
splits into 2. Going left takes you to 2 of the 3 optional rooms, while going
right takes you to the 3rd room and the correct route to the inner stage. The
left side is filled with cat girls and armor dog, take them out slowly, but
watch for the floating eyes, make sure they don't get too close to you. Move
left until you reach the 1st door.

Optional room 1
A massive fire pit spans across the room, while several floating platforms
helps you to get across. The exit is directly across the pit, guarded by 2
armor dog. As you jump on the left most moving platform, you'll see an alcove
above with a barely visible chest. Wait till the platform reaches its highest
height before jumping to land in the alcove, which has 4 chest containing a
power orb, change orb, and treasure. Exit through the bottom left door.

A little to the left is the 2nd room

Optional room 2
Rows of spear bed, with 3 moving platform, one of which moves faster. In
between each spear bed is a small land safe to stand on. 2 of the chest are
sitting in between each of the space, containing a power orb, change orb and
treasure. Exit is on the right.

Move the entire way right, pass the 2nd ladder and the 3rd door is beside it.

Optional room 3
2 trilobites placed across each other, a breakable block in the middle of the
floor. Break the block and fall to the next floor with the same setup as the
last, drop down one more floor to land on 2 chests with power orb and
treasure. Alternatively if you are Raijin you can just high jump up the ledge
leading to the exit and climb down the ladder to claim the chest content
without having to fight the trilobites (you do have to destroy one of them to
jump up without getting hurt) Exit the room.

Climb the ladder near you and 4 cat girls are waiting up top. Move to the
right until you reach another ladder going down. The only door here leads to
the inner stage.

Inner stage
5 trilobites, each sitting on top of a progressively higher ledge. Destroy
them one at a time. A ladder is here, climb up and move a little to the left.
There is a gap you have to jump across. A single block is connected with the
platform you're on, while another block is placed in mid air slight below in
the middle. The idea here is to hold left and walk off the first block and
land on the block in the middle, pause for a split second and high jump left
to reach the other side. If you messed up and the block is gone, there is
seemly no way to get across, it's not true. There is an alternate route. But
before that, if you jump off the platform (without touching the connecting
block) while holding left, you'll fall into an alcove with 3 chest containing
2 power orb and treasure.

If you messed up the jump with the blocks, here is the alternate route to the
guardian. From the base of the ladder, continue jumping to the right until you
come up to a breakable block in the floor, just above you are another one. The
1st one is the correct path, while the 2nd one can net you some treasure.

1st path
Destroy the block and fall down; another block is on the left. Destroy it and
fall down while holding left, you'll drop in a narrow corridor, at the end is
another block. Fall down here and you'll land right on the other side of the
gap you needed to jump earlier.

2nd path
Destroy the block and fall down while holding right, you'll fall into an
alcove with 3 chest containing treasure. Another breakable block is here, but
don't break this one and don't fall down it. Instead fall back down the left
tunnel; you'll see a spear bed positioned directly below the above mentioned
block, that's what would have happened if you went through there. Destroy the
block here and fall down; you'll end up right above the entrance to the 2nd
path.

Once you're on the other side, move to the left and the guardian battle will
start.

Hell mistress
Time: 1:30
As soon as you hear the battle music start up stop moving, 2 sword master
from both side vault in through the floors, one would definitely run into you
should you keep walking forward. A beam of light appears on the left side as
the guardian descent. Use this time to deal as much damage to the sword master
as you can, remember they cannot attack when they use the sword to guard, so
keep attacking to prevent them from moving. They like to jump around a lot,
since the battle space isn't very big; you want to take them out quickly to
avoid them restricting your moment. The guardian itself has a very simple
attack pattern. She puts up an energy shield and fires off a large fast
moving fireball that travels straight, laughs and repeats this 3 more times
before the shield disappears momentarily. It's interesting to note that
whenever she takes damage, she finches for a brief moment and her attack
animation is canceled. So if you keep hitting her she won't be able to fight
back at all. You can actually stand on top of the shield and suffer no damage,
just remember to jump off before the shield disappears so you don't land on
her. Shield bypassing attack such as Raijin and Samurai will finish her in
seconds. The boss will require more effort though.

Difficulty 7-8: No change

Hell spawn
Time: 2:59
I don't even know what I'm looking at; much less give it a proper name. Anyway
you're on flat ground; the boss is hanging down on the right side. It has 3
parts that can be damaged. A mouth piece that comes out and releases 1 to 4
spores before retracting inside. The spores themselves are very erratic,
moving randomly left or right. They are easily destroyed but until the mouth
piece is gone they will prevent you from getting closer to the boss. They will
also self-destruct by themselves. But you don't want to wait that long. Once
the mouth piece is destroyed, a smaller piece located near the body will
begin to lob a single bullet at you. Before throwing each bullet it calculates
your current position and tries to lob the bullet as close to you as possible,
in other words it homes in on you. The final piece is the crystal ball held in
the hand, this is the weak point of the boss. The ball shoots out a laser bolt,
like the bullet piece, it also homes in on you. If you stand right under the
bullet piece, both the bullet and laser will not be able to hit you, if you
move too far to the right, the laser will home in again, so move a bit to the
left and you'll know it's safe when the laser shoots straight down. Then
simply just aim up and take out both pieces to end the fight.

Stage 7:  Gal Agiese
Time: 4:59
Welcome to the last "real" stage of Magician Lord. The outer stage is infamous
for its insane difficulty, while the inner stage is relatively easy. You start
off appearing in midair, don't press any direction and let yourself land on
solid ground. There is a small gap you have to jump and a ladder to climb.
Ahead is the infamous "platform jumping section" Basically there are a total
of 6 moving platform, all moving on the same level at the same speed. The idea
is to jump off to the next platform when the one you are standing on moves
close enough to it until you reach the other side, but this is made harder
when floating eyes are appearing all over the place, their fireball using up
even more space. What more, if you get knocked off the platform, you'll fall
to your doom in the bottomless pit below. This is where a fast trigger finger
and precision comes in handy, forms such as Dragonwarrior and Raijin can kill
the eyes quickly before they attack, all while performing precise jump from
each platform. Once you jump on the 5th platform, you can just hold left and
fall into the tower on the left, you don't have to jump up to the ledge and
manually climb down.

A ladder on each side. The right side allows you to access the last optional
room in the game. Climb down and enter the door.

Optional room
Climb down the long ladder, 2 cat girls are waiting below. Don't go to the
very left, while there is nothing there, as you start moving right a sword
master will vault through the floor. To the right is a ladder and a
collapsible bridge with blocks missing, you can climb down the ladder, but
there is a whole bunch of wandering skeleton waiting down there, as well as
4 cat girls and the occasional sword master that comes through the floor.
The exit is also down here. If you want to skip the fighting for now you can
use the blocks and walk across (you'll have to jump onto the closest block
first, and don't forget to jump off the last block) but if you fall you'll
land right into the heart of the crowd below, so I would suggest climbing
down and take them all out first. Use the ladder right of the exit and climb
up. Another block bridge is here. Use the same way as before and move across
and you'll come to an alcove with a stack of 10 chests containing 2 power
orbs, a change orb, and treasure. Leave through the exit below.

In fact, it is recommended you take the right side ladder down, not only to
access the optional room, but you can just walk off the ledge and take out
the 3 wandering skeleton sitting beside the ladder (sometime one of them sits
too close to the ladder, and you'll have no way to climb down without getting
hurt) Take the next ladder down, with another 3 skeleton waiting nearby
(no choice to drop down this time) The only door here leads to the inner
stage.

Inner stage
Just like the optional room, climb down the long ladder. Immediately 2 sword
master vaults in on both sides. Go left and take another ladder down. The path
splits into 2. If you want to take a safer but longer path, go left, for a
quicker but harmful path go right.

Quick path
Moving right, there is a fire pit with 2 moving platform to help you across,
a ladder at the far right. This ladder leads down a long shaft with a total
of 10 wall spears, 7 of them are near the beginning. After the 7th spear there
is a small alcove, passing 2 more spears further down is another alcove, this
is where the guardian is, but since you cannot jump off the ladder how do you
get into the alcove? You have to take a hit, and then hold left so you can
fall into the alcove, but this will cost you one HP and one power level, and
if you are on your last HP or last life this is just impossible to do. If you
still want to get to the guardian this way, from the top, count the spears
downwards, stop in front of the 7th spear, just before the first alcove. Once
the spear hits you, you'll come off the ladder, you'll be knocked back against
the right wall, quickly hold left so you'll pass the 8th spear and hug the
left wall, falling into the 2nd alcove and into the guardian room.

Safe path
Moving left, a series of ball and chain drops down from an unseen location on
the ceiling. Time your movement and get pass them then climb down the ladder
to the left. A series of 9 moving platforms on various levels over a large
fire pit. On the other side of the pit is a small gap with a chest on the
other side containing a power orb and treasure. You can make a small hop to
get across but it might be a little hard. Instead jump up the moving platforms
and get into the alcove in the middle level. Move right and fall down the
shaft while holding left to land right beside the chest instead of falling
straight into the fire pit below. If you fall through the small gap, there is
a whole bunch of cat girls and sword master below. The right side has the
ladder that leads to the shaft with the wall spears, while the left brings you
back to the left side of the large fire pit. Jump on the platforms again, this
time get up all the way to the ledge on the top right and move to the right. A
single chest is on the right side of a collapsing bridge containing a high
valued treasure. Step on the right most block and hold right as you fall down
into an alcove. The first ladder here leads to a chest with a change orb, just
be careful of the 4 wall spears. A bit to the right and you'll reach the long
shaft. The guardian room is just below you. Wait for the bottom spear to
retract before walking off to the right, once you are clear of the spear
immediately hold left and you'll drop in the alcove leading to the guardian.

Sword knight
Time: 1:30
The final guardian of the game. He is very aggressive. The moment he walks on
the screen he'll start thrusting his sword forward twice, then takes a few
steps towards you and repeat his sword thrust. In fact he is the exact
opposite of the Alien guardian of stage 3, if you don't attack him; he won't
stop moving/attacking. Attack him after he does 2 sword thrusts and he'll stop
and guard with his sword for a moment. If you are getting cornered you can use
this time to get out of it and reposition yourself away from him. Since the
battle space is quite small getting cornered is really easy. He's only
vulnerable when thrusting his sword. Keep attacking and distance yourself from
him and it will be an easy win.

Difficulty 7-8: His sword thrust now moves him forward twice as far, closing
the distance between you in just one thrust.

Demon giant
Time: 2:59
Again I have no idea what the boss is suppose to be, but suffice to say it is
big, almost twice the length and size of your character. No more flat ground,
the environment again becomes hazardous. 3 platforms, 2 small ones on the left
and 1 big one on the right. The boss appears on the big platform small at first
and quickly grows to normal size. Its main attack is to shoot out a pink ball
that splits into 6 other balls forming a hexagon. It can perform this attack
repeatedly until it decides to stop, at which point it will most likely jump
off screen and lands back on a different platform. Actually, which platform it
jumps to depends on which one you are currently standing, if you are on one of
the smaller platforms, it will only stay on the big platform, on the big
platform it can switch between the 2 smaller platforms. To prevent the ball
from splitting up, destroy the original ball and you won't have to worry.
Dragonwarrior and Raijin once again come in handy here.

Stage 8: God of destruction reincarnates
Time: 9:59 (timer continues to count down after each guardian fight)
Also known as the "fight all the guardians again" stage. All 7 guardians have
been resurrected, and you have to beat them again. The fight is on flat land
and with good amount of space to dodge. You'll fight the guardians in the same
order as you did during the stages. Use the same tactics before to defeat each
one, they're the same as before (the only difference is the 2 sword master
accompanying the hell mistress have been upgraded to the blue version, which
is a bit more damage resistant)

Once you defeat the last guardian, the final battle is about to commence.
Before the battle starts, your mentor appears and tells you that Az Atorse is
very strong, and asks you to choose a battle form for the last battle. The best
one would be Dragonwarrior, followed by Raijin and Samurai, Shinobi is ok for
the first part but has trouble on the second, and both the Waterman and
Poseidon are useless in this fight. Once you pick your form the battle begins.

Note that the form you choose will only last on the first life, should
you lose a life you'll be back as Elta. Your chosen form only has the
equivalent of Elta's HP (1 to 3)

Az Atorse
Time: 2:59
You stand on a stage in an alternate dimension; the boss appears in the
background and approaches to the foreground.  It is comprised of a core
carrying a spiky sac on the bottom. Once it appears in the foreground the sac
will be vulnerable. The boss has 3 simple attacks. It moves to the left of the
screen and fires a 2 way laser bolt diagonally, stay under it and you'll be
safe. It repeats the attack on the right side, but fires 3 laser bolt instead,
afterwards it moves to the centre and the sac opens and launches 4 small blue
fireballs that slowly homes in on you, they can be destroyed. The patterns
then repeat. Once you start doing some damage, the spikes on the sac will be
destroyed and the laser attack will be gone, the fireballs can still be
launched. Keep attacking until the sac falls off. The 2nd part of the battle
begins now.

With the sac gone, the core starts to rotate clockwise, quickly picking up
speed. 8 green balls appear from within and rotate with it for a short time
before pausing and shooting out in 8 directions. The pattern then repeats
itself. The ball itself is the weak point. Because of how fast the core is
rotating, it is very possible the green balls can appear when it rotates to
the closest point to the floor, hitting you if you are standing under it.
Stay on the side just to be safe. Dragonwarrior and Raijin can take them out
easily, while Shinobi might have a bit of hit detection problem with his
fireball. The more you destroy, the less chance the ball will hit you when it
launches out. Destroy all 8 balls and the core will explode. Congratulation,
you have beaten Magician Lord.

8. Credits
I would like to thank:
ADK for making this challenging platformer.
SNK for publishing it.
GameFAQs for hosting this FAQ.
And all of you who reads it.

End
